Jump to content
Customer Service 866.965.0400
  • 0

What am I doing wrong?


Bryce

Question

Hey everyone,

I am trying to remove some swirl marks/ light scratches and am having a hell of a time.

To be clear, I've watched TONS of videos on the subject.

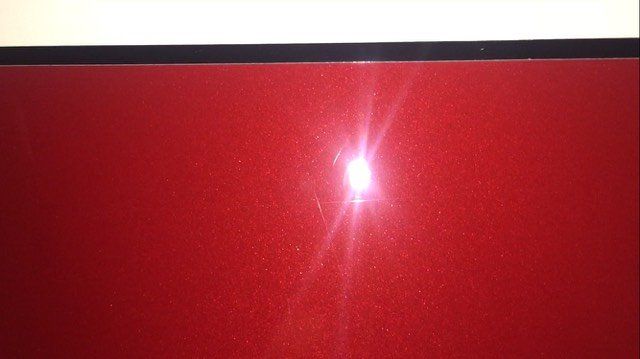
What: 2014 Mini Cooper (Freshly strip washed and clayed)
Tools: Adam's 2 Step Polish System, Griots Garage DA, 5 pack of Uber Foam Pads, and Adam's Orange MF cutting pad.


Here is what I have tried so far:

Yellow Foam Pad with Correcting Polish
Orange Foam Pad with Correcting Polish
Orange MF Pad with Correcting Polish

I started with the least aggressive method and proceeded until I got to the MF pad.  I have been following the Shine-Doc video for removing swirls without any luck.  I have had minimal correction and most of the marks remain.  I assume this means I have very hard paint.  I started with speed 4 and am now trying to correct at speed 6.  I am working 2x2 areas and trying to apply moderate pressure.  I am doing a cross-hatch pattern.

None of the scratches can be felt with a fingernail so I am getting out light/very light scratches.

I'm hoping maybe there is some sort of simple thing I am overlooking.

14389944_10210536516467328_728602434_n.j

Link to comment
Share on other sites

21 answers to this question

Recommended Posts

  • 0

Well it looks like you haven't finished the process. The least aggressive method is a White Pad with Finishing Polish but you say you've only tried Correcting Polish. Finish the process down to the Finishing Polish (maybe a couple passes) then see what your results are.


Correcting Polish and aggressive pads (Microfiber, Orange, and Yellow) can leave micro-marring on paint that looks like swirls but it is cleaned up with Finishing Polish.


I always Finish with a Foam Pad as Microfiber can be a little more aggressive than foam.

Edited by Kingsford
Link to comment
Share on other sites

  • 0

Well it looks like you haven't finished the process. The least aggressive method is a White Pad with Finishing Polish but you say you've only tried Correcting Polish. Finish the process down to the Finishing Polish (maybe a couple passes) then see what your results are.


Correcting Polish and aggressive pads (Microfiber, Orange, and Yellow) can leave micro-marring on paint that looks like swirls but it is cleaned up with Finishing Polish.


I always Finish with a Foam Pad as Microfiber can be a little more aggressive than foam.

The marks you see in the picture are linear and not coming out.  They cannot be felt with a fingernail.  They are from when I was an idiot and used a squeegee to dry, I believe.


My understanding is, correcting polish will leave a hazing effect, not a scratching effect.  I believe I should be seeing a slightly dull paint instead of the same remaining scratches. 


Never mind on the tool, read a bit closer.  How much pressure while polishing?


I first started very light with just the weight of the machine and my hand and now I am applying what I would consider moderate pressure.

Link to comment
Share on other sites

  • 0

Ok, I still stand by everything I said before but I'll add the following; Deeper scratches require quite a bit more work. Use 4" pads with a drill to get them out. It will leave holograms because it's a rotary tool but it'll come out with a Dual Action machine. Scratches like that will require much more time and patients. Be sure to keep the rotary moving or you will burn through your clear.


If I do not have a rotary handy, would spending more time with the DA be my best bet?  


It's all a bit overwhelming because there are so many variables.  I'm wondering if I should stick with the MF and adjust speeds or if I should use a foam pad and keep my speed at 6.  There is also the factor of using the correcting polish or the finishing polish.


They make it look so easy in the videos! :willy:

Link to comment
Share on other sites

  • 0

I would try the microfiber with Correcting Polish but keep to the normal speed. Higher speeds can ruin pads. The heat and force can separate the hook and loop from the foam.


It's easy with the right tools, right pads, right polishes and right conditions. 


A Flex will correct faster than any other DA because of the forced rotation but it's hard to finish with. Rupes are good for just about anything which makes them the best overall devices IMO. A PC will take a long time to do anything because it's weak but eventually it will get the job done. Obviously Rotary's are fast correctors but are a bit more dangerous and will require a DA to clean up the holograms.

Link to comment
Share on other sites

  • 0

When using the DA, is your pad spinning? I mean f you apply so much pressure you actually stop it from rotating, So it sort of just buzzes around. I remember way back, someone had suggested marking the back side of your pad with a black marker on the foam. So that way when using it, you can quickly check to see if its still spinning. 


 You can kind of see it on one of my old pads

9101311A-57E5-416D-BE66-8C4324F4DE33_zps

I bought my setup used and the backing plate is marked. It is spinning while using it.


I was just surfing the internet and I might have found out some of my problem. It appears the MF pad that was sold to me may be defective. My fibers are not a loop like a normal MF texture. Instead they are more like a hair texture I would say. I'll give Adams a call tomorrow to see if I can get anything figured out. Hopefully just a new pad will help.


I was always under the assumption you could get decent correction from a cutting foam pad. If that's the case, I still need to work on variables.

Link to comment
Share on other sites

  • 0

When using the microfiber pad with PCP I will use the brush after every panel and make sure all those strands are back up. That helped a lot when i could not get some of the swirls out. And I was using the cyclo which is slower than the griots I believe and still manage to get them out. And i put different kinds of pressure on each panel some are not bad attach pic is the worst place a lil bit more pressure but made sure it is still oscillating.post-14690-0-48560700-1474357953_thumb.jpeg

Link to comment
Share on other sites

  • 0

You have RIDS (random isolated deep scratches) and they do require a different approach. The pros would go at it with very light wet-sanding then repeat the correcting process. I wouldn't recommend it if you have never wet-sanded before.


I don't believe a defective pad is to blame (I would still get them replaced though).

Link to comment
Share on other sites

  • 0

Can someone confirm if this pad looks correct?  I am comparing to what I see on the website and the website certainly shows more of a microfiber texture.  This pad is more "stringy" with long fibers instead.

Don't mind how dirty it is, I cleaned it after taking photos of it.

14423582_10210543953213242_530561880_o.j

14375159_10210543953373246_179558281_o.j

Link to comment
Share on other sites

  • 0

Looks fine. It's just a deep scratch. Just because you can't feel it with your nail doesn't mean it's not deep.


I'll go back at it then.  This is my first time using a DA.  When I went to auto body school we only used rotaries.  To be honest, I disliked the polishing portion so I did most of the paint work while in school.

Link to comment
Share on other sites

  • 0

When you think you're moving slow enough move slower,takes a little practice but you'll get it.


I think that is precisely my problem.  With the rotaries, we moved quickly to avoid burn through.


From what I can tell, the polisher spins so slowly that it would take me having to grab a cup of coffee with the thing running to do damage.


I also think I was going too light on polish/compound.

Link to comment
Share on other sites

  • 0

I think that is precisely my problem.  With the rotaries, we moved quickly to avoid burn through.


From what I can tell, the polisher spins so slowly that it would take me having to grab a cup of coffee with the thing running to do damage.


I also think I was going too light on polish/compound.

You won't hurt anything.Keep the pad flat with about 5 lb of pressure the pad should rotate slowly.Take 15 to 20 seconds to move 2 ft.

Others with more experience might have better advice but this works for me with my porter cable,I think the griots is very similar. check out the videos on polishing with the porter cable they  might help.The microfiber pad does take more product than the foam pad,try the foam first though moving slower.Good luck 

Edited by 1911A1
Link to comment
Share on other sites

  • 0

Can someone confirm if this pad looks correct? I am comparing to what I see on the website and the website certainly shows more of a microfiber texture. This pad is more "stringy" with long fibers instead.


Don't mind how dirty it is, I cleaned it after taking photos of it.


14423582_10210543953213242_530561880_o.j


14375159_10210543953373246_179558281_o.j

Fibers look fine and this might just be an illusion but that pad appears to look like one that I have that I overworked and overheated while doing some heavy paint correction. It feels like the foam support is all broken down near the center but firmer around the outside. Does it feel like that at all? If the foam breaks down and is less firm, it would be harder to apply even force or the right amount of force to the paint. If that makes sense.

Link to comment
Share on other sites

  • 0

Fibers look fine and this might just be an illusion but that pad appears to look like one that I have that I overworked and overheated while doing some heavy paint correction. It feels like the foam support is all broken down near the center but firmer around the outside. Does it feel like that at all? If the foam breaks down and is less firm, it would be harder to apply even force or the right amount of force to the paint. If that makes sense.


I believe the foam is of even density.  I cleaned all of my pads out today and didn't notice anything abnormal.  

Link to comment
Share on other sites

  • 0

Your pad looks fine imo. Make sure you at least brush the pad out between sections the best method is a air hose. You should get more pads so you don't delaminate it since you working on the correction phase it will take some time and build up heat if the lad is not left to cool down. Some scratches won't come out without some wet sanding or the drill attachment for a rotary style setup. I would reccomend trying the drill out on it to see if this helps. If you have body training wet sanding seems like a high possibility for you to be safe. Hope you get what you need. Call the team at Adams they are a wealth of information

Link to comment
Share on other sites

  • 0

So I went back at it and got pretty good results.  I went with a  speed 5 and applied more pressure.  I also worked the polish much longer.  the scratches that remain almost look like they are floating on water or something.  They don't look like they are on the surface. 

With that being said, I think I misjudged my paint and it is actually softer than I expected.  I was trying to see if my thumbnail could get caught on scratches and I noticed just the pressure of my thumbnail left scratches.  I would assume that is a good indicator of soft paint correct?

Link to comment
Share on other sites

  • 0

So I went back at it and got pretty good results. I went with a speed 5 and applied more pressure. I also worked the polish much longer. the scratches that remain almost look like they are floating on water or something. They don't look like they are on the surface.

Not sure if this is what you are seeing but scratches on a microscopic level have sharp edges down into the clear. When you polish them, it smoothes out those edges and looks like the clear is melting back down into the scratch. They get much finer even if you don't get them all the way out.

Link to comment
Share on other sites

Create an account or sign in to comment

You need to be a member in order to leave a comment

Create an account

Sign up for a new account in our community. It's easy!

Register a new account

Sign in

Already have an account? Sign in here.

Sign In Now
×
×
  • Create New...