

MikeS
-
Posts
61 -
Joined
-
Last visited
Content Type
Profiles
Forums
Gallery
Blogs
Downloads
Events
Posts posted by MikeS
-
-
Does anybody use plastic lined lug nut sockets to help protect wheels during removal? Or maybe it's just as easy to put a few wide rubber bands on a standard socket (check the broccoli or lobsters at the grocery store)...
I guess I could plasti-dip a regular socket as well. Hmmm, lots of ideas the more I think about it! None of them protect the lugs themselves though.
I'm debating on whether it's worth tracking down a purpose-made protective socket.
Any thoughts?
-
If you use the focus pads on a drill, don't do like I did.
I'm not saying "don't go that route".....just don't go gung-ho like me.
http://www.adamsforums.com/forums/machine-polishing/14165.htm
FYI for anybody who was watching my thread.....I've been swamped and haven't made any progress whatsoever yet.
-
You can leave a dollop of Americana wax under the seat

-
A.J.,
Thanks for the long reply, lots of good info in there.
While stunned may be too strong a word, I'm not surprised that I could do this using focus pads on a drill.....I'm just surprised that I did do it. I went into it fully aware (if not as appreciative as I should have been) that heat was the enemy, and that I needed to be very careful. The work was done using relatively short passes of polishing (~5sec), checking for heat on the pad and panel between passes. There's no denying it....I used poor technique and damaged my panel. I don't yet understand if I moved too slow, used inadequate product, used too much pressure, some combination of this, or all of the above. It isn't worth second guessing though, since I won't attempt the same type of work again. From now on, I'll reserve the drill for glass work and headlights, and buy a PC for paint work.
The big picture:
This damage is at the tail end of a 7 foot long scratch that catches three of my panels. I had hoped to save this panel and get the other two repainted. That's not really a legitimate option any longer. So.....I need to figure out how to find the best folks to handle my repair. Unfortunately, I don't know any discriminating customers here locally who could turn me onto an excellent shop. I don't want any part of the vehicle to come back worse than when it went in. Including paint, overspray, trim, or interior (from poor shop cleanliness).
-
Score one for the scientific method! Forget about the video. It's useful to get a good visual of the spot, but can't hold a candle to the results from "phase 2 testing".
Phase 2 Testing:
Step 1: Re-cleaned the area using IPA and a double-soft microfiber
Step 2: Hand rubbed a spot next to the blemish with SHR for 15 seconds. Photographed the towel both before and after.
Step 3: Hand rubbed on the blemish with SHR using a fresh spot on the towel for 15 seconds. Photographed the towel both before and after.
Note: The photos have slight changes in shadows between shots, but should be relatively consistent exposures...each was taken in the same place with a point and shoot. Only changes in lighting would be due to changes in daylight as cloud roll through (and shadowing from my hands while holding the camera).
The Control - Testing Next to the Blemish
Towel Prior to Hand Rubbing Adjacent to Blemish:

Towel Prior to Hand Rubbing Adjacent to Blemish (with SHR):

Towel After Hand Rubbing Adjacent to Blemish:

Testing on the Blemish
Towel Prior to Hand Rubbing on Blemish:

Towel Prior to Hand Rubbing on Blemish (with SHR):

Towel After Hand Rubbing on Blemish:
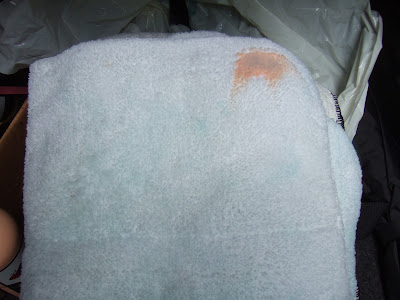
Thus, my conclusion is that I have actually cut through the clear somehow. I was extremely careful (I thought to the point of paranoia) while using the focus pads, so I am stunned that I managed to do this. Regardless, what's done is done. I'll have to consider what do do about it now. Any advice? The panel in question is at the tail end of a multi-panel scratch that may require respray. I'd hoped to polish out the rear quarter panel, and thus limit the required respray to the door and front fender.
-
So, I tried the check that Dylan suggested.....looking for color transfer from a hand rubbing using SHR. Maybe I goofed, but it seemed inconclusive to me (but I'm a rookie). A quick video of this process and the resulting towel are below.
I did notice that even though the blemished area feels as smooth as the surrounding area, it seems to sound rougher under the microfiber towel.
<EMBED height=360 type=application/x-shockwave-flash width=640 src=http://www.youtube.com/watch?v=AdkYBjBjq88?version=3 allowScriptAccess="always" allowfullscreen="true">
-
David, as best as I can tell, it feels exactly the same smoothness as the surrounding paint (i.e. very smooth).
Dylan, I'll check for that color transfer tonight....have to wait until I'm home with all of my gear. I'll use a doublesoft with a drop of SHR for the color transfer check.
-
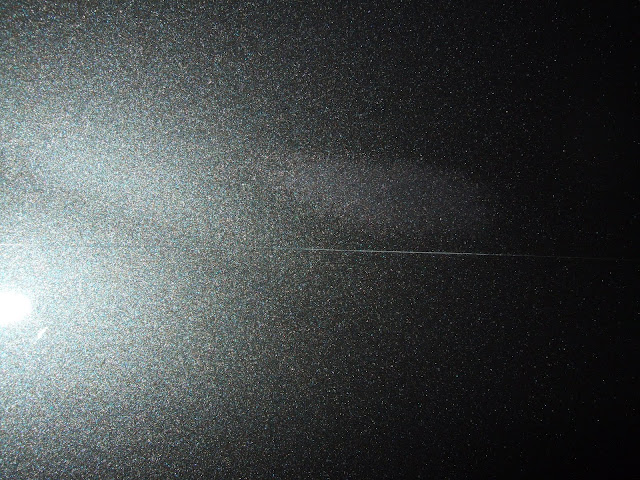
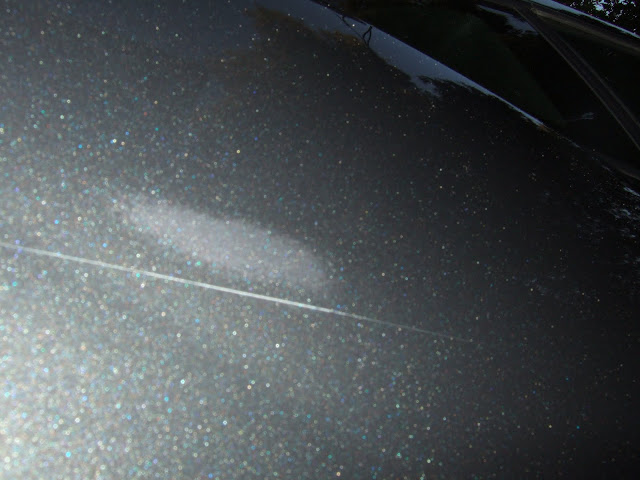
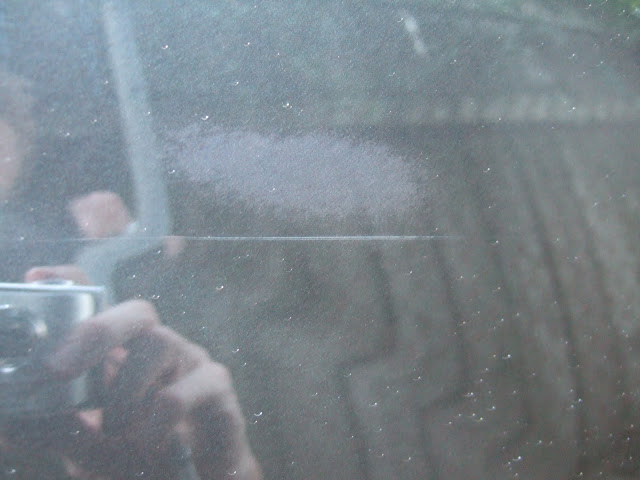
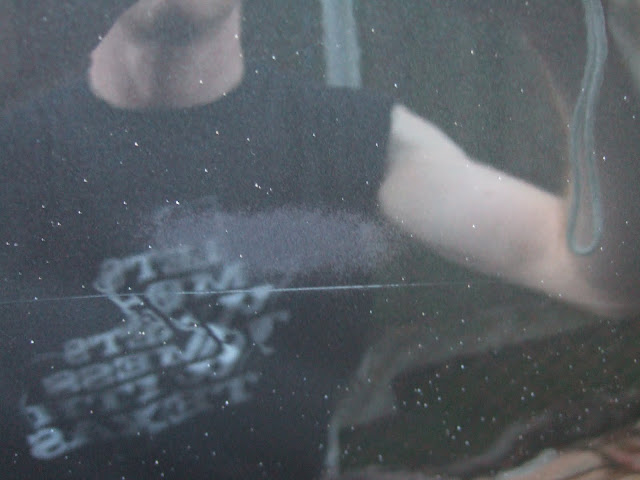
Here are the photos of the local area. To answer Dylan's questions....
The vehicle is a 2011 Chevrolet Camaro. The location seen in the photos is the rear quarter panel/fender, just above and slightly ahead of the rear wheel. It is metal, rather than a plastic panel. I'm kicking myself because I don't remember which product I was using when I noticed the spot (SHR vs FMP).

-
Ryan, no PC or FLEX (although I do have a birthday coming up.....). I would have used that if I had the option, since I know it's safer.
Jon, Chris, I'll post pics tonight.
Didn't notice any transfer onto the pads, but I'll double check when I get home this evening.
-
That about says it. I think I burned my clearcoat trying to polish out a scratch using focus pads on a drill. I tried to polish only for a few seconds at a time, keeping moving, and ensuring I kept the rpms under control. Never seemed to quite get all the parts of the technique right though. Sometimes the pad seemed too wet, with a bit of splatter, and other times it seemed to dry. I found it difficult to tell when I had worked the product the right amount. That may mostly be due to inexperience with these polishes though.
FYI, used the orange pad with SHR followed by a white pad with FMP.
Ended up with a small cloudy patch just adjacent to the scratch that I was working on. It feels just as smooth as the paint, but I'm scared to try to do anything further with it. I'll snap a few pictures and post.
Unfortunately I can't imagine anything else it could be. Guess I learned a lesson......practice on the junk car first!
Plastic Sleeved Lug Nut Socket
in Wheels, Tires, Trim, & Undercarriage
Posted
Thanks for the thoughts, all. Sounds like plenty of options to protect the wheel itself, but fewer options for the lug nuts themselves.
I may throw the HF lined sockets onto the Christmas wish list, although I'm always conflicted buying their stuff for various reasons...