

avvblanc01
-
Posts
68 -
Joined
-
Last visited
-
Days Won
1
Content Type
Profiles
Forums
Gallery
Blogs
Downloads
Events
Posts posted by avvblanc01
-
-
I typically bump it up to 5 on the Flex. Slow is the name of the game. Watch Dylan on that Corvette. He moves slow and steady. You can probably get away with 4 passes per step meaning two vertical and two horizontal. See where that gets you.
5 on the flex for all steps?
-
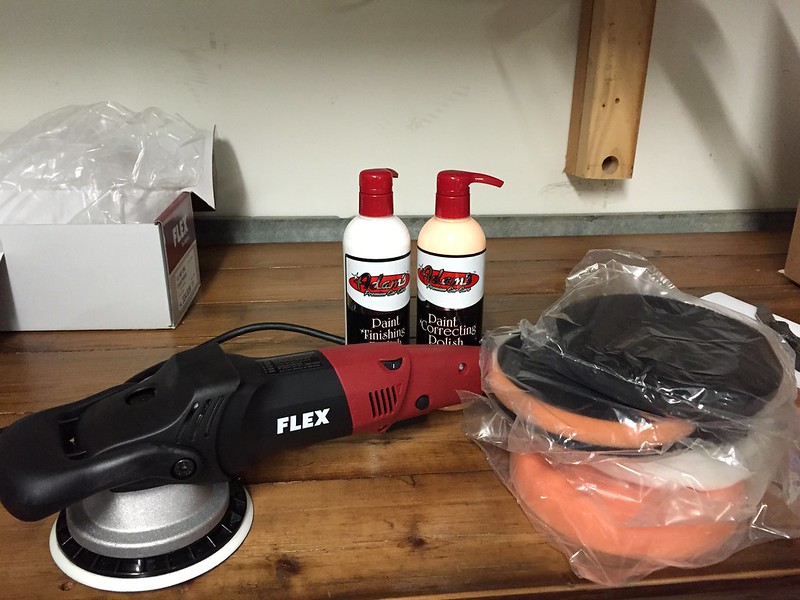
Oh and heres the flex posing with the truck!

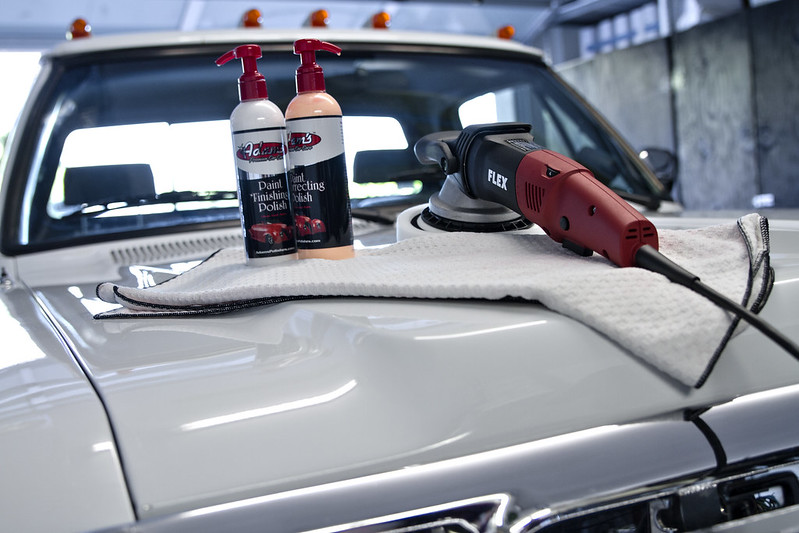 Adams paint correction by 1991 1st gen, on Flickr
 -
Okay so I did my test patch and before I go further I'd love some more advice.
I did the first black correcting pad on speed setting 3, and then setting 4 for the rest of the pads. I did notice that during the first black correcting pad, the pad and paint surface did get warm, but not hot. I pre-lubed all the pads with detail spray to help but I'm assuming a bit of warmth is normal?
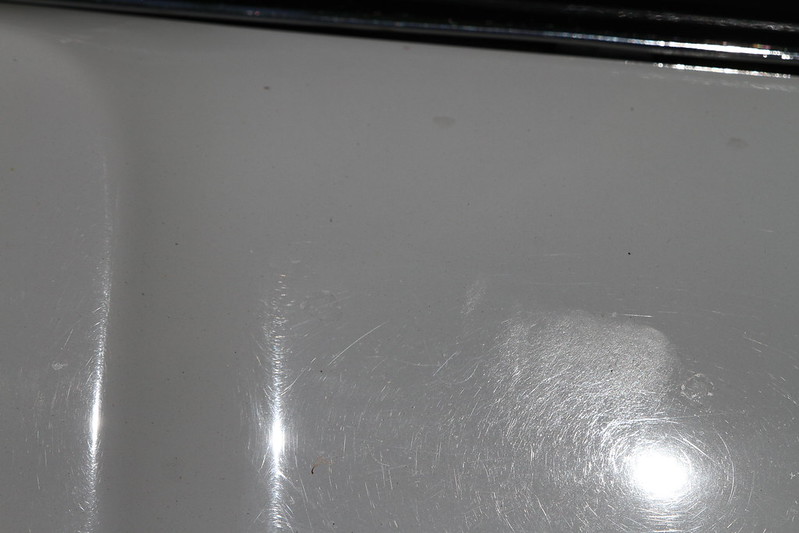
The results were pretty dang good, but there are still scratches remaining that you can see in the photos below. To get rid of these do I:
1) do more passes?
2) use more product?
3) up the speed?
4) move slower?
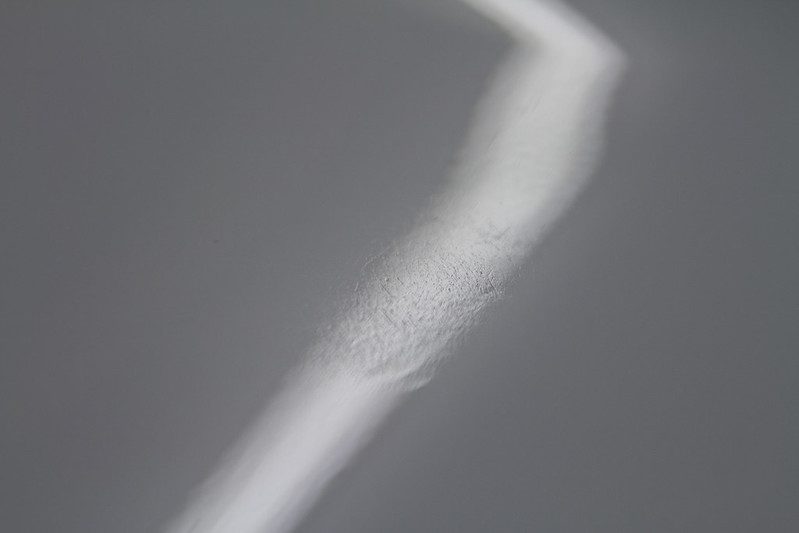
None are deep enough to feel with a fingernail, but apparently too deep for what I did so far!
Also that one big deep spot got better, but I think it would need wet sanding to truly be removed from the paint...kind of a bummer.
here are some photos of the area after all four pads:
Before and after line (wow):
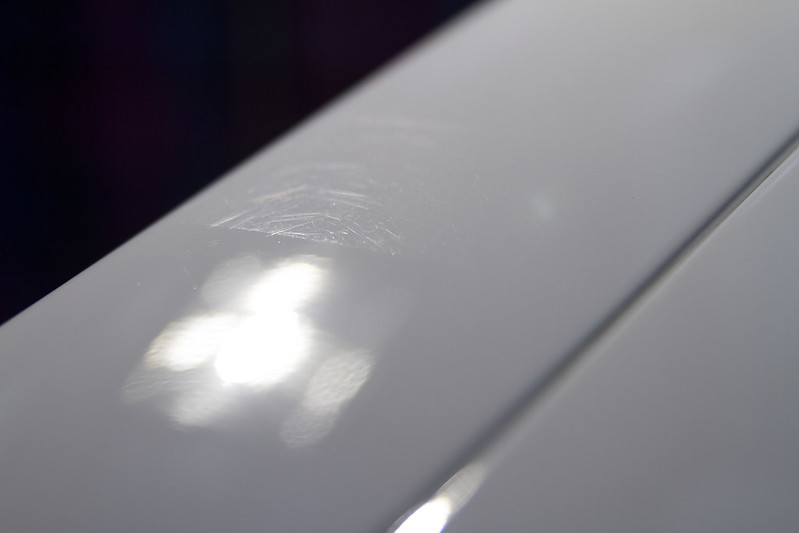 Adams paint correction by 1991 1st gen, on Flickr
example of the light scratches that are still remaining (ignore the bottom right corner, thats the big bad spot):
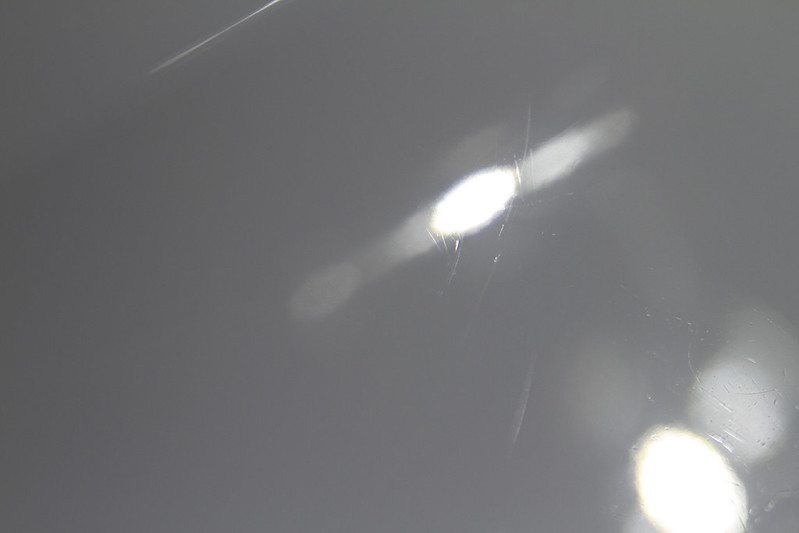 Adams paint correction by 1991 1st gen, on Flickr
that one bad spot that just isn't gonna come out
 :
: Adams paint correction by 1991 1st gen, on Flickr
 -
-
Good luck with the project, from the pics you are showng, I'm assuming the paint should improve by 70-80% with a 2 stage method, which would look fantastic. Work in 2ftX2ft areas and if you have access to compressed area, i would use it frequently to clean the pads as you keep compounding and polishing. I typically decontaminate my paint with something like a Sonax Fallout Cleaner before i go into my Adams 2 Bucket System and Adams Soap. We don't know how thick the clear coat is, but keep in mind that when you are compounding, you are only taking very small amount of clearcoat off, microns...1 micron = .003 millimeters.
that makes me feel a lot better about the clear!
good tip on the decontamination as well. Ill add that to the list of things to do!
-
Thanks for all the advice!
The truck is regularly clayed, waxed, and sealed as needed so thankfully claying it again for the PC should take me too long.
I do plan on breaking up the project though since its going to be a slow process as I learn what I'm doing. Hoping to take maybe two days doing it.
thanks for the tip on the lights. My garage has fluorescent overhead lighting, and then Im planning on using some extra LED spot lighting to help me out. Hopefully Ill be able to see everything pretty well?
Im curious to see how hard it is going to be to spot the flash point though.
MC2HILL that photo is getting me all excited! I can't wait for everything to come in the mail!
I love photography, so don't worry, Ill be posting more pictures than you guys ever wanted to see of the truck haha
-
Thank you for the answers everyone and thanks for the compliments on the truck!
that video is exactly what I needed for some inspiration shine doc.
Once the goodies come in the mail, Ill update the thread with some pics of the progress and probably a few more questions haha
also feel free to add any other tips for white paint correction. Ive been reading that a light helps to see imperfections when working?
-
Actually the plasti dip is a great thought! It would totally seal in the paint and definitely buy you some time.
It would also let you experiment with some color options for when you do paint it. The new top coat they just released also looks killer too. no more ugly matte finishes.
-
Hey everyone. First up, I'd like to apologize for starting yet another "first time" thread, but this truck is my absolute baby and I'd really like some advice from the more seasoned detailers on here.
So here is what I'm dealing with:
The truck:
1993 Dodge D350 with the original 3 stage white paint. It is VERY rare for a 1st gen dodge to have original paint, so I want to make sure that I do not make any mistakes when doing paint correction on mine.
The previous owner took great care of it and even garaged it, but from the looks of it he was using steel wool to wash and wax the truck!

The whole truck is covered in some pretty severe swirls, with other areas much worse off. It almost looks like there was a branch or something that rubbed against the paint for an extended period.
Im not expecting to get every single thing out, but I would like to get as close as possible.
here is the truck:
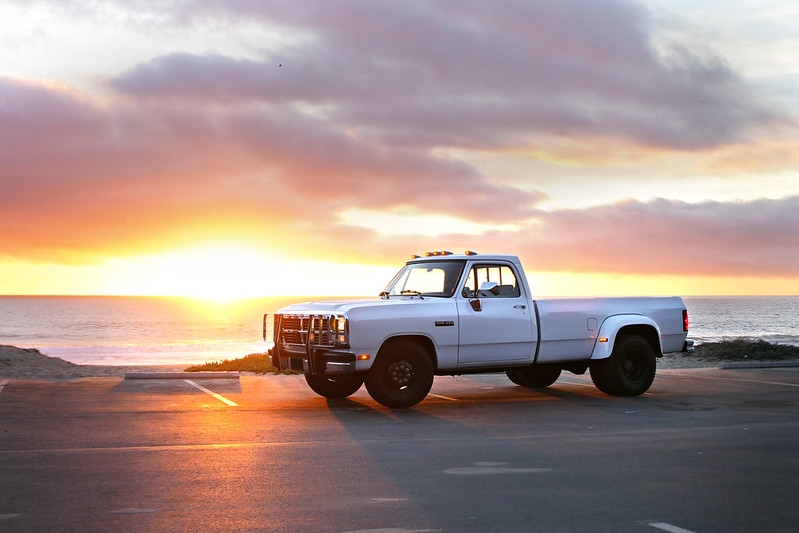 1993 1st gen Dodge D350 cummins by avvblanc01, on Flickr
here are some photos of the paint damage sorry the truck isn't clean right now but you can still get the picture:
 IMG_1491 by 1991 1st gen, on Flickr
here is one of the really bad spots right above the bright area:
 IMG_1493 by 1991 1st gen, on Flickr
My plan:
I have never done paint correction before, and I understand white isn't the easiest color to work with. I also have a pretty limited budget, but here is what Im planning to purchase:
-flex 3401 VRG polisher
-Adams 2step polishing kit with the 7in pads
Questions:
1) Does this sound like the right set up to tackle my paint problems?
2) Am I going to need wet sanding to see any real difference in the paint or can I get a marked improvement from the 2step system?
3) Are there any tips you guys have for polishing paint like this?
4) Should I worry about thinning/damaging the already fragile dodge clear coat when Im doing this?
In advance, thank you so much for your help. I just wanted to check with you guys before I pull the trigger, purchase everything, and start in on my paint!

 :
:


help with a tough first time correction
in Paint Correction & Polishing
Posted
The first black pad was probably around 4-5 passes, but I wasn't counting on that one. The rest were about two passes so I'll up the number of passes and the speed as well thanks to your guys advice.
I was just worried because the paint and pad were definitely warm when I did the first black correcting pad and I wasn't sure if I was doing too much!
Thanks for the tip on the corners too. Im tried my best to avoid going too hard on the corners but Its something I was worried about.
Ill go back at it again this afternoon and hopefully get it figured out!
I enjoy taking photos so Im glad you appreciated them too! There's no way I could get any of the scratches and marring to show up on my phone camera so out came the DSLR haha