

Holder
-
Posts
1,384 -
Joined
-
Last visited
-
Days Won
13
Content Type
Profiles
Forums
Gallery
Blogs
Downloads
Events
Posts posted by Holder
-
-
I use a combination of both halogen and LED. I move them around a lot to get different angles.
-
-
-
As far as how busy, I'm pretty much booked thought the end of June. I schedule cars only on the weekends and have thought about taking a few on during the week just to catch up. I try an balance the detail work with spending time with the family. Basically my 'free' time is spent detailing or attending shows and car meets. All detail work is paid in some way or another.
The biggest obstacle has been pricing jobs accordingly, it's hard to tell a buddy you're going to charge them $300+ on a detail job.
-
Up next was this 56 Chevy. The car had been in storage for about 10 years. The paint wasn't terrible but was very dull. I did a few test spots and the orange foam pad and PCP did the trick once again. I tried the orange microfiber. Due to the single stage paint after about half the hood pad got so clogged up that I could not duplicate the results.
I finished this one with Liquid paint Sealant.


- moparbrian, Redbeard, CTFocusST and 2 others
-
 5
5
-
I'll use this thread to post pictures of vehicles I've completed. I will also use this thread to post pictures on shows that I attend. I'll try and share my process for each vehicle. I've been doing this as a hobby for about 3 years and never thought I would be this busy.
I'll start with this already very clean VW Golf R. It had wash marks that was very difficult to pick up on camera. I used the PCP with the Orange Foam pad with the Flex. That removed all the defects with the exception of a few deep scratches. The sun wasn't out by the time I was done so I didn't get too many pictures.


- Grey Ghost, 19.5 Dually and moparbrian
-
3
-
I've thought about doing a light under my hood. Where did you mount the light?
-
Great job, is that your wagon in the background?
Thans, and yes that's my wagon
-
-
-

- BRZN, CTFocusST, blcksilv08 and 1 other
-
4
-
Charge what you think you need to charge. Don't worry about scaring him off. Your price is your price. Go with an hourly rate for a vehicle this size. If he doesn't want to have it done for your price move on to the next customer.
-
-
so what's faster...the caddy or the camero as they have the same motor??? you can tell us, we won't tell the owner you took the maro for a spin!!!!
Actuall me and another ZL1 owner took our cars to the track and ran each other. Both bone stock. He was a touch faster.
I want to add a ZL1 to the garage in the next few years.
-
The damage to this car was all done by the dealer. Actually a few of them. The owner got a smoking deal on the car.
-
For Protection I went with Adams Liquid Paint Sealant. In the end I had a super happy customer who at the beginning wanted to buy a polisher kit from me. He changed his mind when he saw all what went into making his car look flawless again.


- blacktitan27 and Redbeard
-
2
-
This beauty came to me with 5k miles on her but was in kind of a rough state. The right rear quarter had appeared to be repainted and had wet sand marks left behind. The rest of the car had some nasty scratches that needed attention.
The wheels had never been properly cleaned. With Adams Deep Wheel Cleaner they bled pretty good.

Started with a strip wash. A few ounces of Adams Car Shampoo and a few ounces of All Purpose Cleaner in a foam gun.

After drying and claying, it didn't need much for paint decon, I treated all the plastics with Adams Super VRT.

I did a few test spots, one on the drivers door and fender. That right rear quarter I tackled last due to it needing the most work. This particular Camaro I had to go pretty aggressive, so I ended up on a heavy cutting pad with a medium compound to do most of the leveling and scratch removal. I came back with Adams Paint Correcting Polish and Orange Foam Pad to removed the haze left by the cutting pad and compound. My machine of choice was the Flex 3401.


- Redbeard, Thorsager and blacktitan27
-
3
-
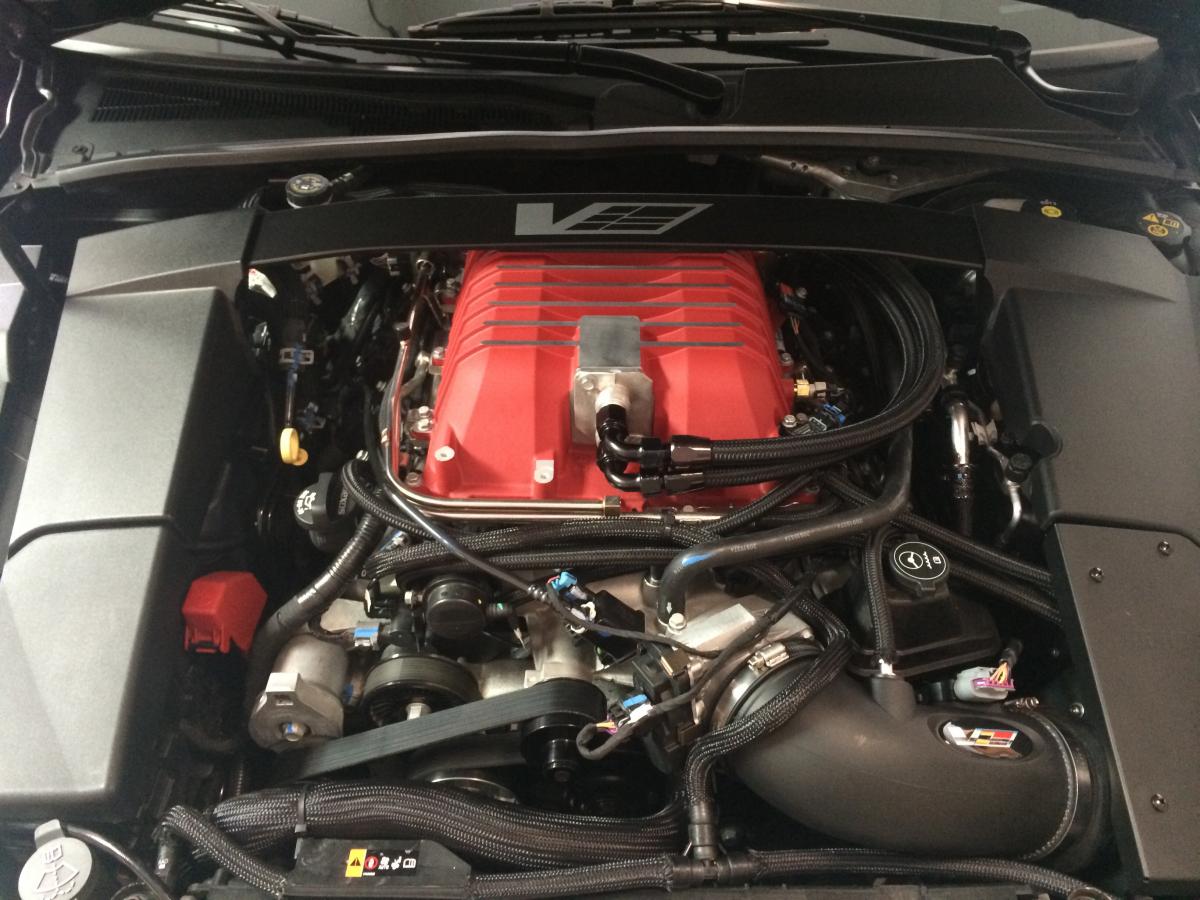
She's back together for now. Still needs a tune. Definitely more coming in the near future.


-
Lookin good! I don't know if I would ever have the guts to bake my headlights open
 . If you haven't done the LEDs yet i would recommend vleds.com they have an amazing product and awesome customer service (not as good as Adam's but thats impossible to beat). I did a full LED conversion and couldn't be happier with how bright they are.
I definitely had a few hiccups with pulling the lights apart and putting the back together. It wasn't easy but I got it done and they look great.
I ordered the LED DRL's from weaponxmotorsports.com
-
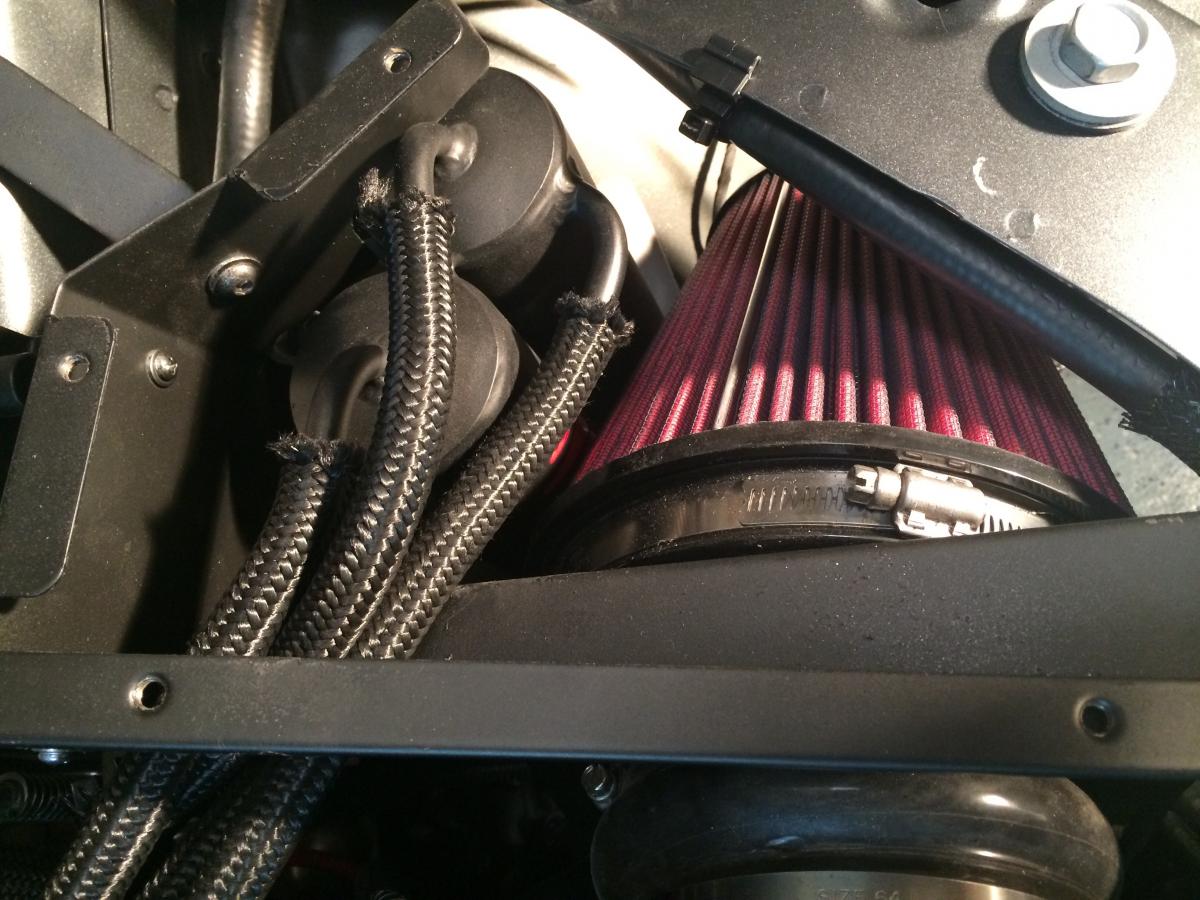
More progress. Modified Airaid intake to make room for dual oil catch cans. There is literally no other place I. This engine bay to mount this thing. I'll also be putting in a drain line so I never need to open up the intake area to drain.


-
A little mock up to see if the lid clears. It still needs a little trimming.


-
Bigger heat exchanger getting installed tonight. Put a little extra touch, I hope it looks good when it's all installed.

-
Old vs New. I still need to have about .010" milled off the top to clear my hood.

-
I also had the strut brace powder coated


CleaningFoam Pads
in General Detailing Discussion and Questions
Posted
I let mine soak in APC like most of you but recently I've been giving all my pads and applicators a spray of Micrifiber Revitilizer. It cleans the pads up real nice. It really does a good job of braking down the sealant, wax or polish.